Migrating WordPress Sites Using Duplicator
Migrating a WordPress site can be painful. WordPress workflows are not exactly the smoothest. In your cliche corporate environment, there might exist a workflow and pipeline to help make that process smooth and maintainable but if you're a freelancer, your process could be a bit sporadic. Deploying your WordPress site to production or a client's server can be an absolute nightmare if you don't plan for it properly.
That's were Duplicator makes your life easier. This article details steps to move a site from your laptop or devlopment environment to Production or another destination server. While marketed primarily for backups and migrations, I use duplicator to move or re-create a WordPress in another location if the situation ever calls for it.
Pre-requisites
1. Have credentials for the WordPress site you want to migrate. We're going to refer to this as the source site. Credentials
here includes your WordPress database credentials and WordPress admin login credentials.
2. Have credentials for the new server you want to upload your WordPress site to. We're going to call this the destination
server.
3. For the destination server, you will need a way to upload to it. Usually this means FTP access. Get FTP credentials
for your destination server.
Have credentials for both sites in hand.
Create Archive And Installer File
Step 1. Log into the source WordPress site you want to migrate.
Step 2. Go to "Plugins" and then "Add new".
Step 3. Search for "Duplicator" in the search bar.
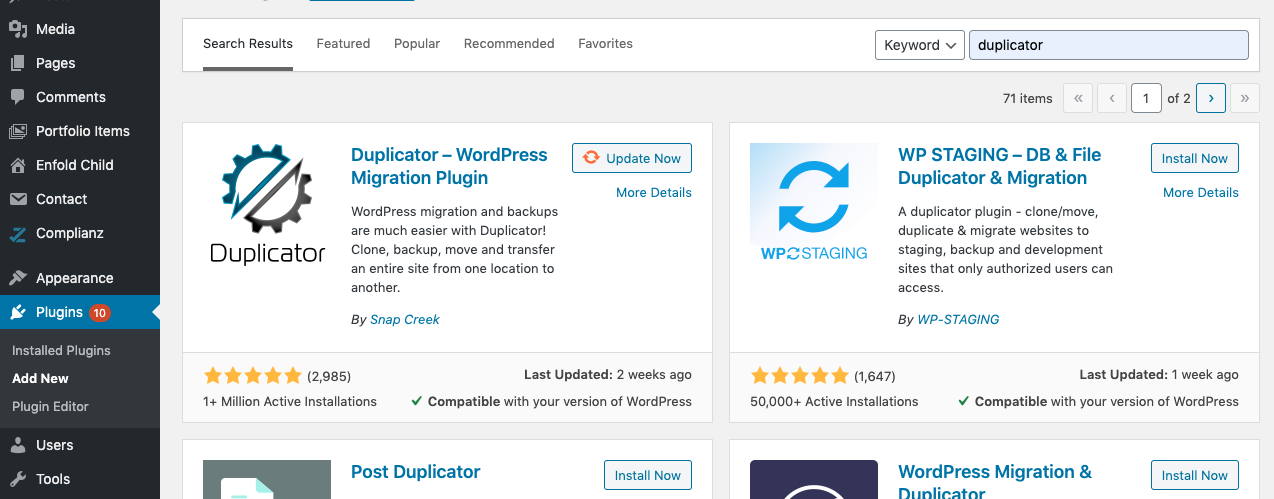
Step 4. Click on the "Install Now" button next to Duplicator.
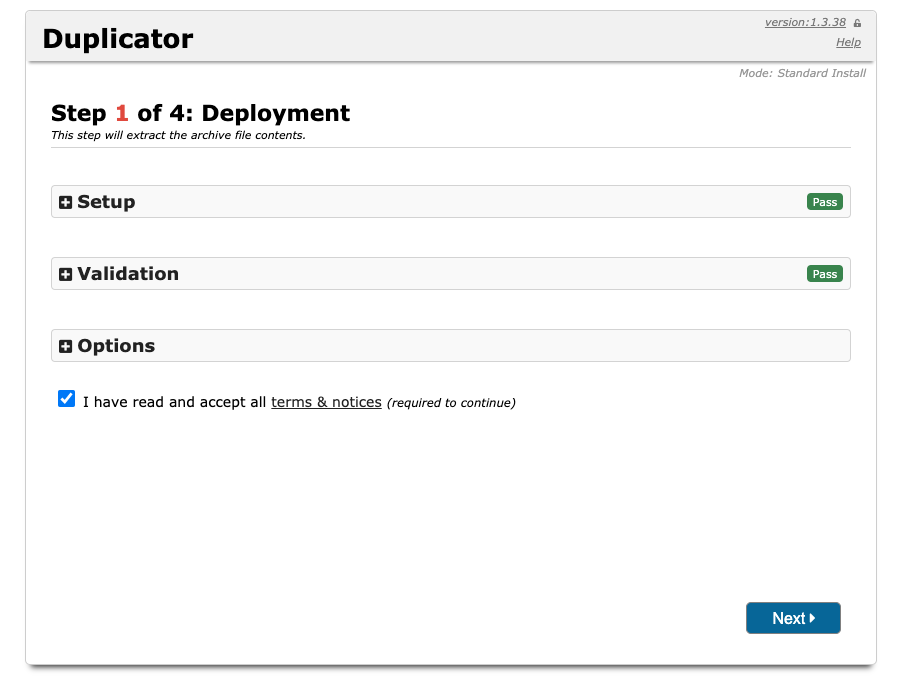
Step 5. Once done installing, click on Duplicator in the sidebar. Then click on "Create New" on the top right.
NOTE: Change the default Name of the archive to something more recognizable if you like.
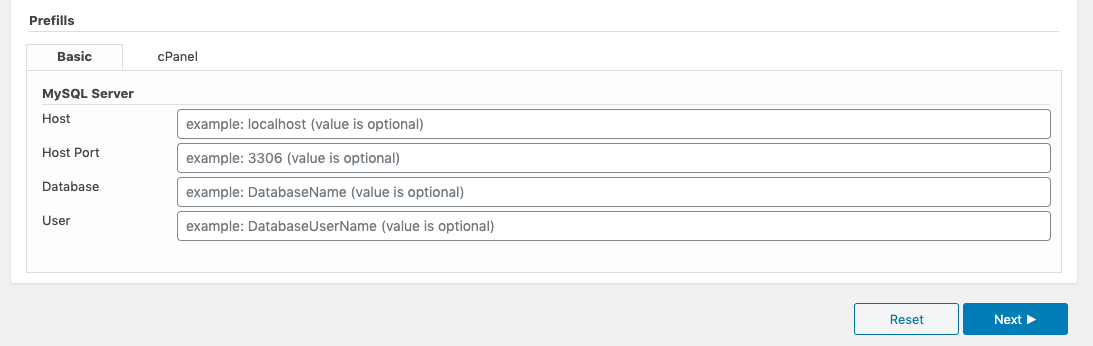
Step 6. Scroll to the bottom of the page and fill in the database credentials. Then click Next.
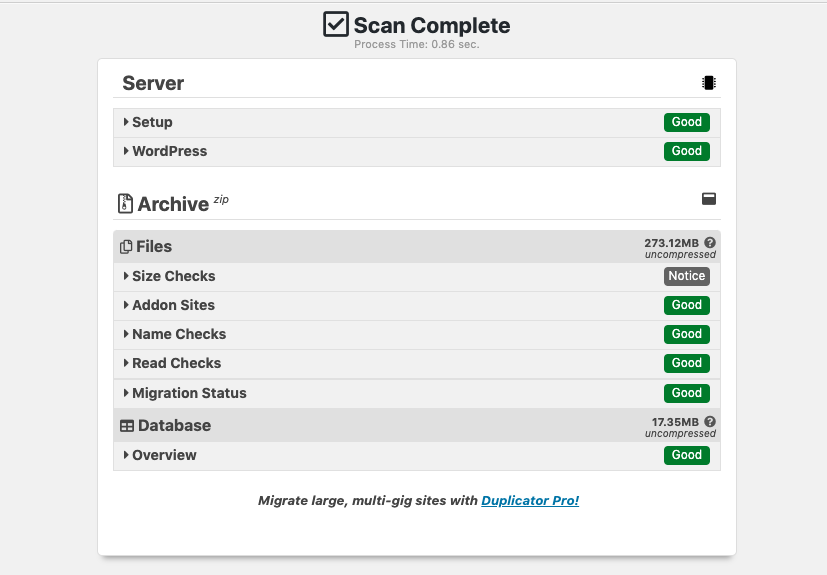
Step 7. You should see a status similar to the screenshot below. Don't worry if there are several notices instead of greens.
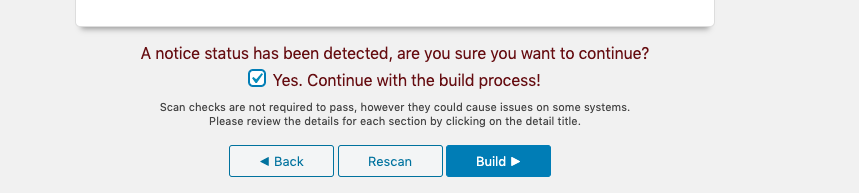
Step 8. Click the checkbox at the bottom about continuing if you have any notices. Then click Build.
Step 9. Once the build status is complete, you should a screen similar to what's below.

Step 10. Click the one-click download link to download both files.
Upload to Destination Server
Step 1. Use a ftp program like Filezilla to upload the downloaded files to the new Wordpress location.
NOTE: The files should be uploaded to an empty folder and preferably not an existing wordpress install.
Step 2. Upload the installer and the archive file into an empty folder on your destination server.
Run the Installer Script
Step 1. In your browser, go to the location of the installer script.
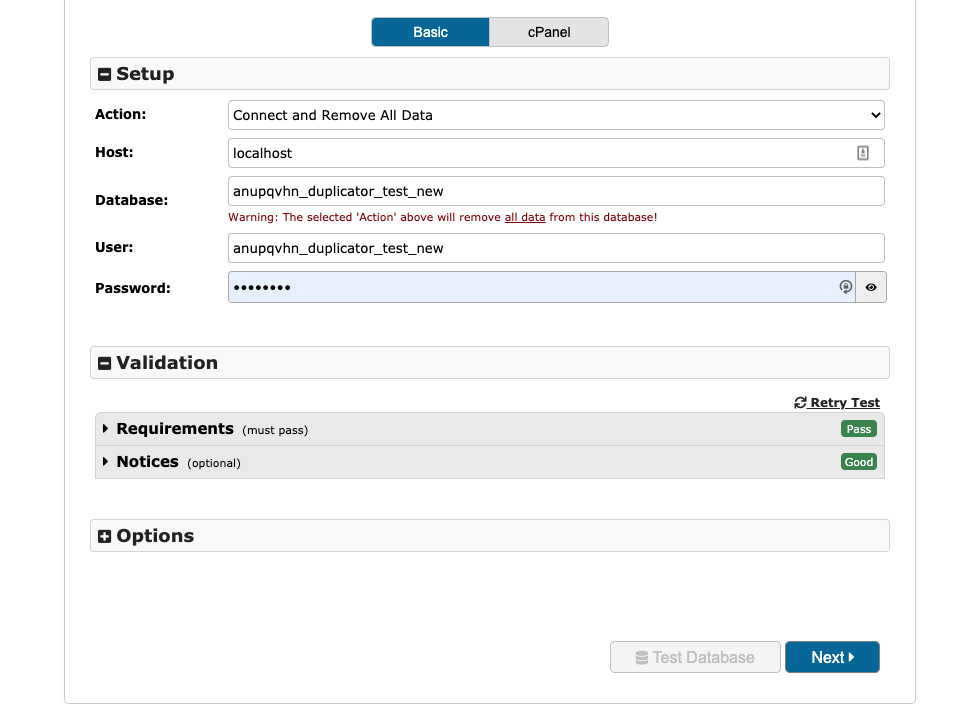
Step 2. Create a new database and database user at the destination server preferably mysql since that is the goto default for WordPress.
Step 3. Add those credentials to the duplicator page. Click next and complete all the steps.
Step 4. Click on the admin login link to log in as an admin. The credentials should be same as your origin wordpress site.
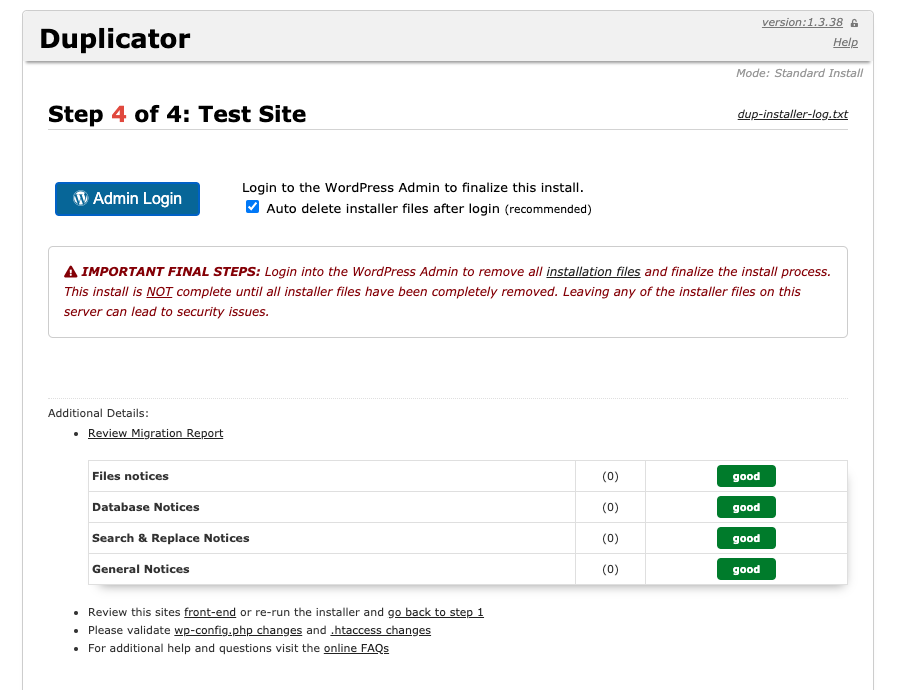
Step 5. Once you log in to the admin panel, the existing installer and archive files will be deleted.
You should now be looking at the WordPress Dashboard. Congratulations! You have successfully migrated your WordPress site.
Appendix
Link to the official documentation for using the installer and the archive files
Flickr Image Source