The Greatest Package Manager
Mirror mirror on the wall, who's the fairest package manager of them all?
Let's face it … all the people reading this article do not agree on everything, and the greatest package manager is the one that annoys you the least this month.
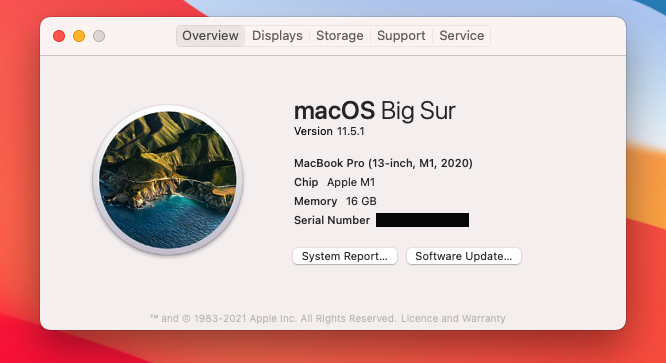
I recently found myself having to re-install and set up my dev environment from scratch on a new 2020 Apple Macbook Pro with the new Apple M1 chip. This means Vim plugins, Jetbrains IDE's, programming languages, plugins, more plugins, another 100 extensions I didn't know I was using, and so on and so forth.
NOTE: The new M1 chip won't run older packages or programming languages out of the box. So if you are thinking of buying a Mac with an M1 chip, expect to go through some suffering during setup.
Wouldn't life be easier if you had one package manager that could install it all?
Enter asdf. Mac and Linux variants are supported well. Sorry, Windows users but no windows support at this time.
With asdf, you can do what they call a separate global and local setup for various languages and versions.
For example, a single directory with code on your machine that needs NodeJS v14,
Elixir 1.10, and Erlang 23 can be set up using asdf to use those versions specifically
in that repo. No more nvm use v14 and other package managers to use
specific versions in that repo. When you switch into that directory, the
version of NodeJS available will be whatever specific version you want it
to be.
Installing asdf
Having asdf up and running involves several steps. Once you do them a few times, you will have them down. It's not as complicated as it looks.
- Installing dependencies
- Downloading asdf core
- Installing asdf
- Installing a plugin for each tool/runtime you wish to manage
- Installing a version of the tool/runtime
- Activate a specific version either locally or globally
Installing dependencies
asdf needs gpg and gawk installed on the system. Since we are going to be using git in later steps, git needs to be installed as well. Individual programming languages, frameworks, libraries or tech might have their own dependencies. Don't worry about this until you reach that step.
brew install gpg gawkDownloading asdf core
We're going to use the git approach to install asdf simply because this way, you know what you're getting. Brew and other methods have been unreliable in my experience.
Run git clone from the command line or your git gui of choice. The below command will clone the repo as a hidden directory in your home directory.
git clone https://github.com/asdf-vm/asdf.git ~/.asdf --branch v0.8.1Installing asdf
Installing asdf is the one place where it gets tricky. Make sure to look over the official site for your specific setup. I will be going for Zsh and Git.
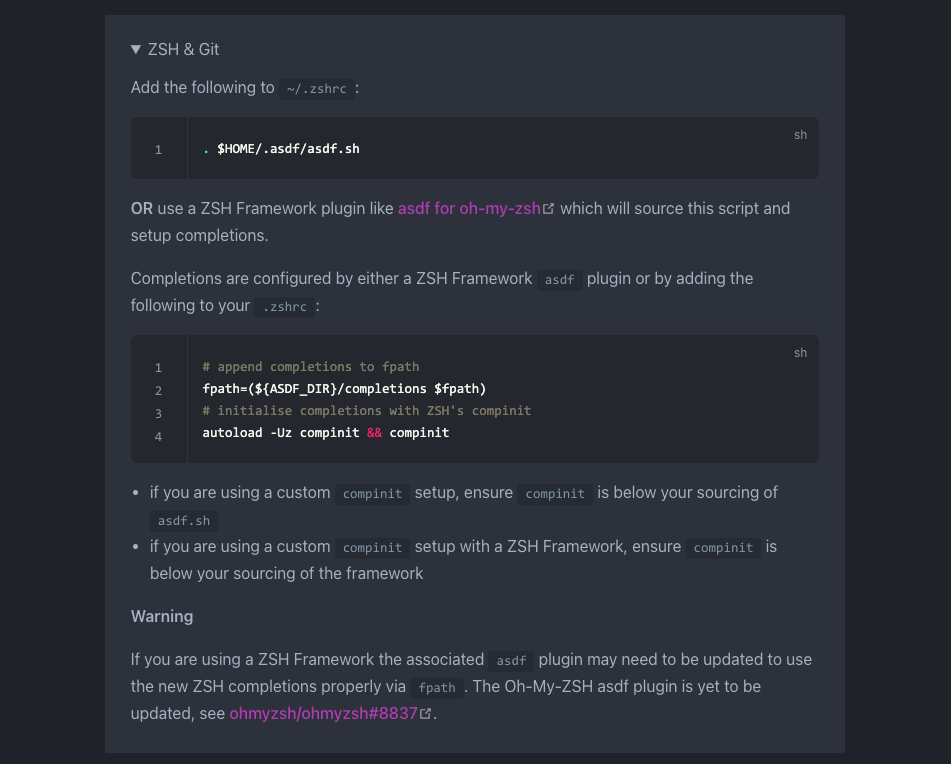
Find your specific set of circumstances on the official site for this step and follow them. It's as simple as that.
This should complete the installation for what is commonly referred to as the asdf core. All this means is that you have finished installing asdf and haven't yet installed any specific languages or frameworks.
Installing a plugin for each tool/runtime you wish to manage
Plugins here refer to either a programming language, framework, tech or database.
Running asdf plugin list all at the command line will list all available plugins
for asdf. There are a lot so scroll or grep it to find what you are looking for.
So running asdf plugin list all | grep spark should return
spark https://github.com/joshuaballoch/asdf-spark.gitAll popular programming languages are available. Adding a specific plugin or programming language means adding an entry that points to a specific asdf repo. This will make sense when you see the below command.
asdf plugin add nodejs https://github.com/asdf-vm/asdf-nodejs.gitTo verify that it has been correctly added, run the below command.
asdf currentYou should see something similar to what's below. If you've added additional plugins, you should those as well.
nodejs ______ No version set. Run "asdf <global|shell|local> nodejs <version>"Installing a specific version of the tool/runtime
Now that you've successfully installed asdf and added a plugin, it's time to actually install a binary or something runnable.
We're going to continue with our NodeJS example. The first step is to list out all available nodejs versions. If you have a specific version in mind then search for that version.
To search for all available versions of nodejs, run the below command.
asdf list-all nodejsTo search for specific versions of nodejs, run the below command.
asdf list-all nodejs 14Finally, to install a specific version, run the below command.
asdf install nodejs 14.17.5Activate a specific version either as global or local install
Global simply means anywhere on your system. So say you are in a directory where you did not specify what version of nodejs should be used, the global version will be the one that runs.
To set the installed version of nodejs globally, run what's below.
asdf global nodejs 14.17.5Local simply means a specific directory. So say you git cloned a repo and want that only a specific version of node is used in that directory, you'd run what's below.
asdf local nodejs 14.17.5Typing nodejs -v should now give you that familiar output.
Congratulations! You now have a working setup of asdf and are free to not have to switch between a 100 language specific package managers for a single project.
An Awesome Practical Example: Wolfbot
TLDR: This is NOT financial advice.
DISCLAIMER:
The material on this website is provided for informational purposes only and does not constitute an offer to sell, a solicitation to buy, or a recommendation or endorsement for any security or strategy, nor does it constitute an offer to provide investment advisory services by Servingniches or me. In addition, the material offers no opinion with respect to the suitability of any security or specific investment. No information contained herein should be regarded as a suggestion to engage in or refrain from any investment-related course of action as none of Servingniches nor any of its affiliates is undertaking to provide investment advice, act as an adviser to any plan or entity subject to the Employee Retirement Income Security Act of 1974, as amended, individual retirement account or individual retirement annuity, or give advice in a fiduciary capacity with respect to the materials presented herein. If you are an individual retirement or other investor, contact your financial advisor or other fiduciary unrelated to Servingniches about whether any given investment idea, strategy, product or service described herein may be appropriate for your circumstances. All investments involve risk, including loss of principal. Servingniches makes no guarantees as to the accuracy or completeness of the views expressed in the website. The views are subject to change, and may have become unreliable for various reasons, including changes in market conditions or economic circumstances.
Now that we got that out of the way ...
So the project that we're looking to install or use as an example for this is Wolfbot. You can find it at https://github.com/Ekliptor/WolfBot .
Feel free to install a repo or project closer to your heart. You will have to modify the asdf plugin steps to match your language or tech of choice but it will be similar and not too painful. If you're dealing with a relatively major programming language, then you will be fine. Otherwise, write your own plugin to support it in asdf. It's relatively easy and you get brownie points for it. I'd say go for it.
Wolfbot is a cryptocurrency trading bot.
Features:
- Trading: buying + selling, portfolio management (sync balances with exchanges)
- Margin Trading: leveraged trading including short selling and futures trading
- Arbitrage: profit from price differences between 2 exchanges (done "on the books" with balances on both exchanges, no withdrawals from exchanges required)
- Lending: lend your coins on the lending market of supported crypto exchanges for the highest possible interest rates
- Backtesting: test your trade strategies in simulation on historical data
- Web Plugins: Access social media data from Twitter, Reddit, Telegram Channels, RSS Feeds,... to trade based on news and real world events (not part of open source version yet)
Git clone the repo.
git clone https://github.com/Ekliptor/WolfBotUsing asdf to install and setup dependencies
Since we've discussed the steps in detail previously, I've left out verbose explanations.
To get Wolfbot up and running, we will need. Copy pasted from https://github.com/Ekliptor/WolfBot
- NodeJS >= 12 && <= 14
- MongoDB >= 4.0
- TypeScript >= 3.5
- yarn >= 1.9.4 (npm should work too, but no support given if you run into errors)
- Webpack >= 4 (only for UI modifications)
cd Wolfbot
asdf current # to see what versions are being used in this directory
asdf plugin add nodejs https://github.com/asdf-vm/asdf-nodejs.git
asdf install nodejs 14.17.5
asdf local nodejs 14.17.5
asdf plugin add golang https://github.com/kennyp/asdf-golang.git
asdf install golang 1.15
asdf local golang 1.15
# For local mongodb development, you can get away with this setup.
# Don't use asdf for production
asdf plugin add mongodb https://github.com/sylph01/asdf-mongodb.git
asdf plugin add mongosh https://github.com/itspngu/asdf-mongosh.git
asdf install mongodb latest
asdf install mongosh latest
asdf local mongodb 5.0.2
asdf local mongosh 1.0.5
# For more details: https://docs.mongodb.com/manual/tutorial/install-mongodb-on-os-x/
# If a brand new installation on an Apple M1 Mac
mkdir -p /opt/homebrew/var/log/mongodb
mkdir -p /opt/homebrew/var/mongodb
touch /opt/homebrew/etc/mongod.conf
Open a new tab for the below command. The below command starts up mongodb in the foreground.
mongod --dbpath /opt/homebrew/var/mongodb # starts up the mongo db in foregroundRename the configLocal-sample.ts in the Wolfbot directory
to configLocal.ts. Edit the configLocal.ts file.
Add in your mongodb url in the mongo url section of the file.
mongodb://127.0.0.1:27017/?directConnection=true&serverSelectionTimeoutMS=2000Setup Yarn
asdf plugin add yarn https://github.com/twuni/asdf-yarn.git
asdf install yarn latest
asdf local yarn 1.22.11
Final steps to run everything installed so far.
yarn install
yarn tsc # to compile all TypeScript files. Ignore the errors. Press Ctrl-C once you see the watch message.
# the default node_module download for this particular package doesn't
# seem to have a build directory so we're building one
yarn tsc --project node_modules/@ekliptor/bit-models/tsconfig.json # to compile all TypeScript files. Ignore the errors. Press Ctrl-C once you see the watch message.
# Finally to run the bot
node build/app.js --debug --config=WhaleWatcher.json --trader=RealTimeTrader --noUpdate --noBrowser
You will additional configuration like api keys for various exchanges to get the bot running fully but the above was meant to get the bot in a runnable state.